
Data Broker allows for certain data points to be pulled from, and in certain cases pushed to, your Portfolio Management System. In most cases, there are a baseline set of fields that will be mapped as part of the Implementation of Data Broker. With continued use of the integration, there may be data points that you and your firm are looking to have mapped. This article will walk through how to access the Data Mappings page in the Data Broker Installed Package, how to map a Salesforce field to an external, and how to make additional Salesforce fields available for mapping.
How to Access Data Mappings
To access the Data Mappings, you will need to go to the Data Broker Installed Package.
- Click the Setup Gear in the top right-hand corner and click Setup
- In the Quick Find on the left-hand side of the Setup Home Page, type in "Installed Packages" and click Installed Packages
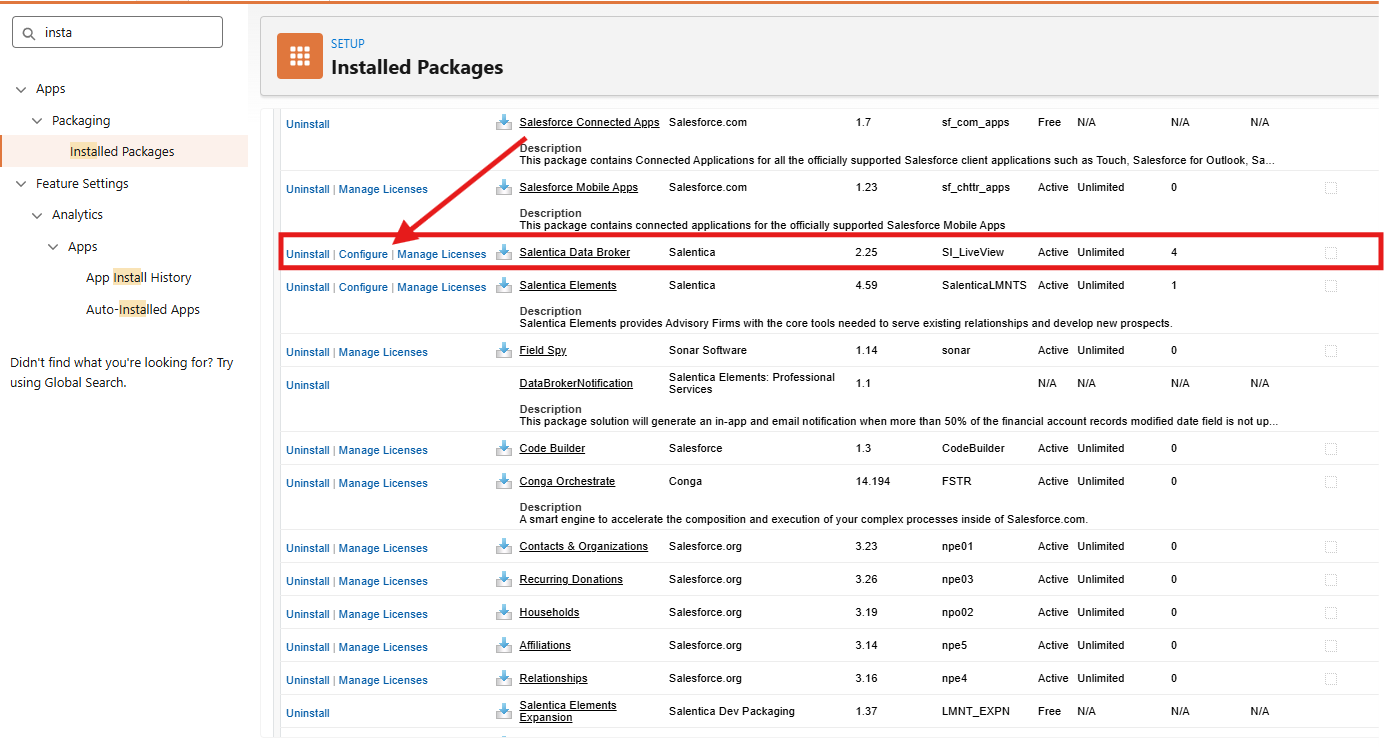
- After clicking Installed Packages, you will be taken to the page where all of the packages that your firm Users in Salesforce are listed. You'll look for the package labeled as "Salentica Data Broker" and click the Configure link next to it
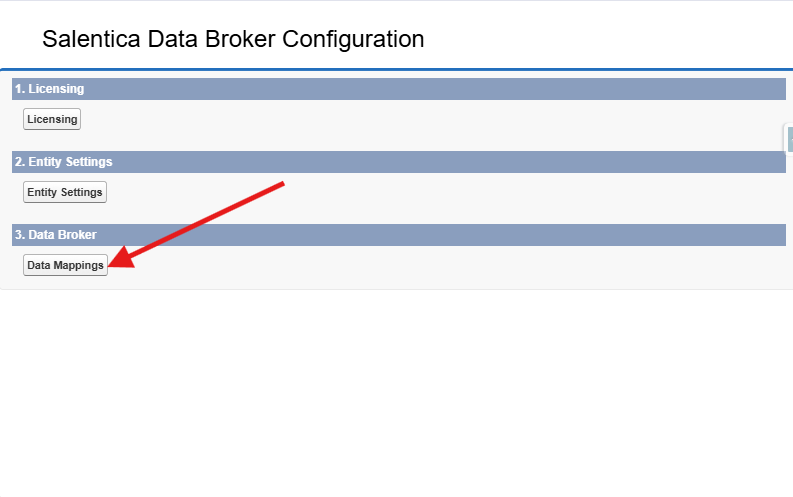
- When you click Configure, this will open a popup window, which is the configuration screen of the Data Broker installed package. In this popup, you'll click on "Data Mappings"
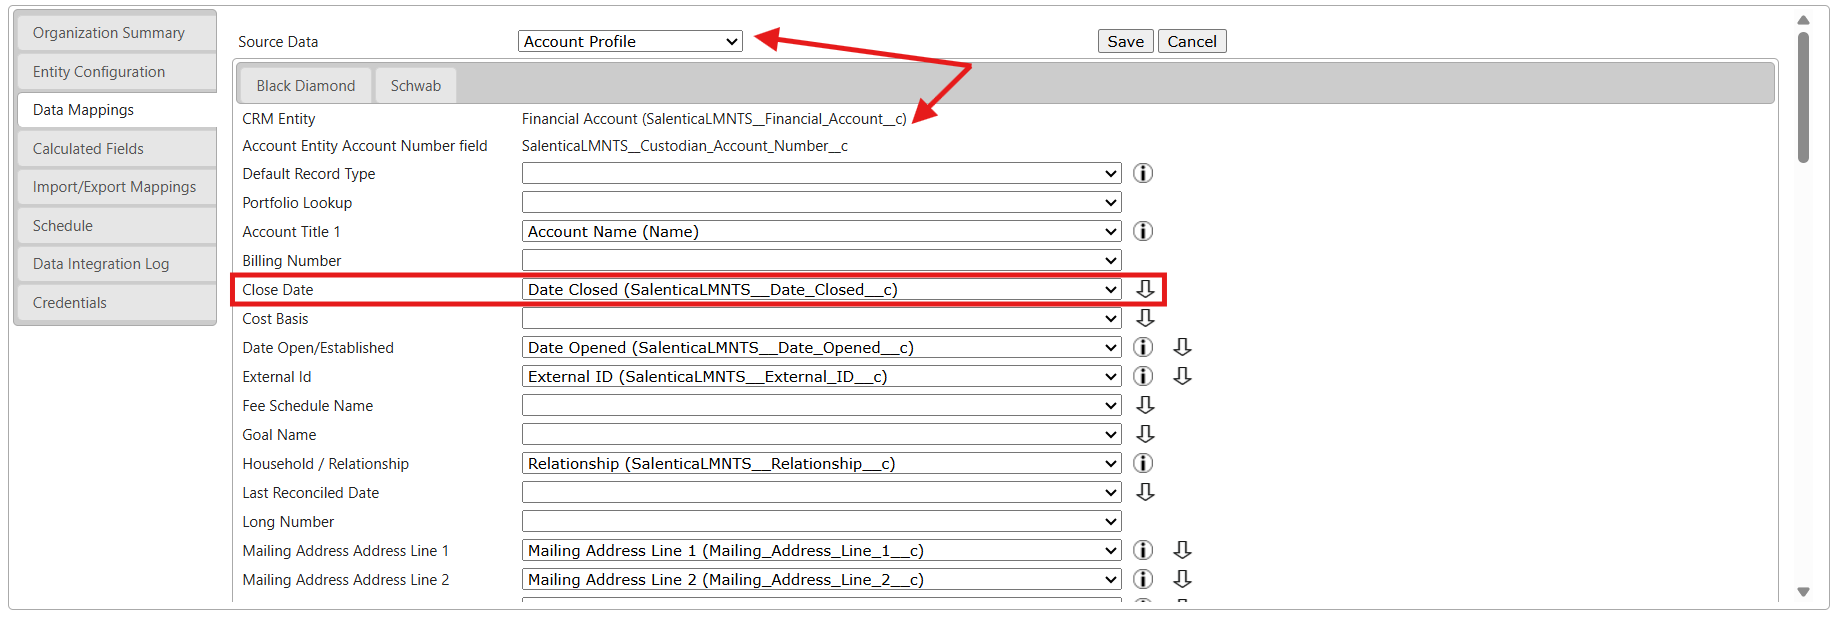
- After you click on Data Mappings, a new screen will load that will default to Data Mappings tab, which includes the available data mappings for the integration.
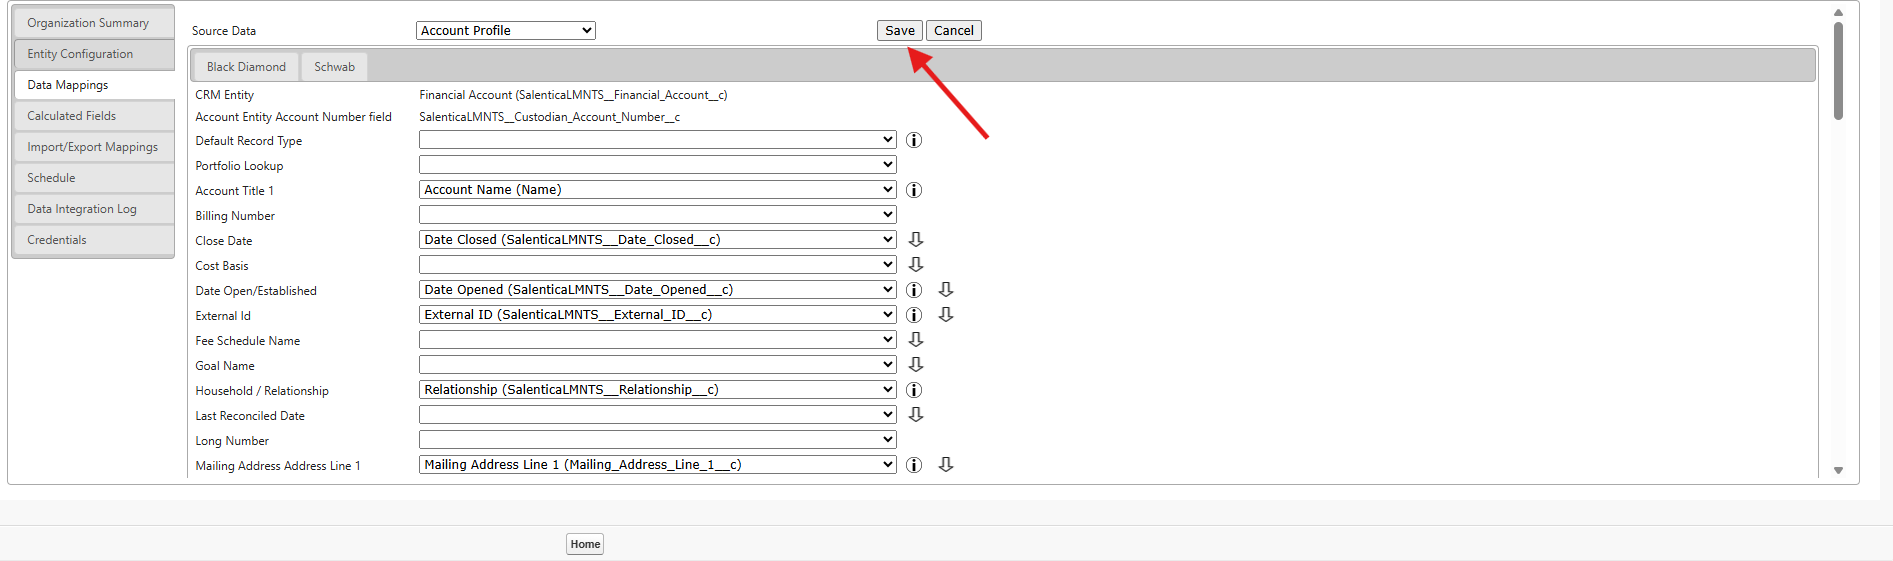
- The Source Data is the source entity that the data is being pulled from and the CRM Entity is the Salesforce object that entity is mapped to. For example, if the Source Data is Account Profile and the CRM Entity is Financial Account then you're looking at the data mappings for the Account entity.
- Below that, when viewing the Data Mappings themselves, you'll see a static value on the left-hand side and a dropdown on the right-hand side. The value on the left-hand side is the data source and the dropdown on the right-hand side is the field that data will be mapped to. For example, when Date Open/Established is mapped to Date Opened then the Open Date of a Financial Account from the Source System would feed into the Date Opened field in Salesforce.
Now that you've accessed the Data Mappings, the next step will be to update the data mappings.
How to Update Data Mappings for an Available Salesforce Field
Using the guide above, you should now know how to access the data mappings page in Data Broker. Now we'll take this a step further and walkthrough how to update the a data mapping.
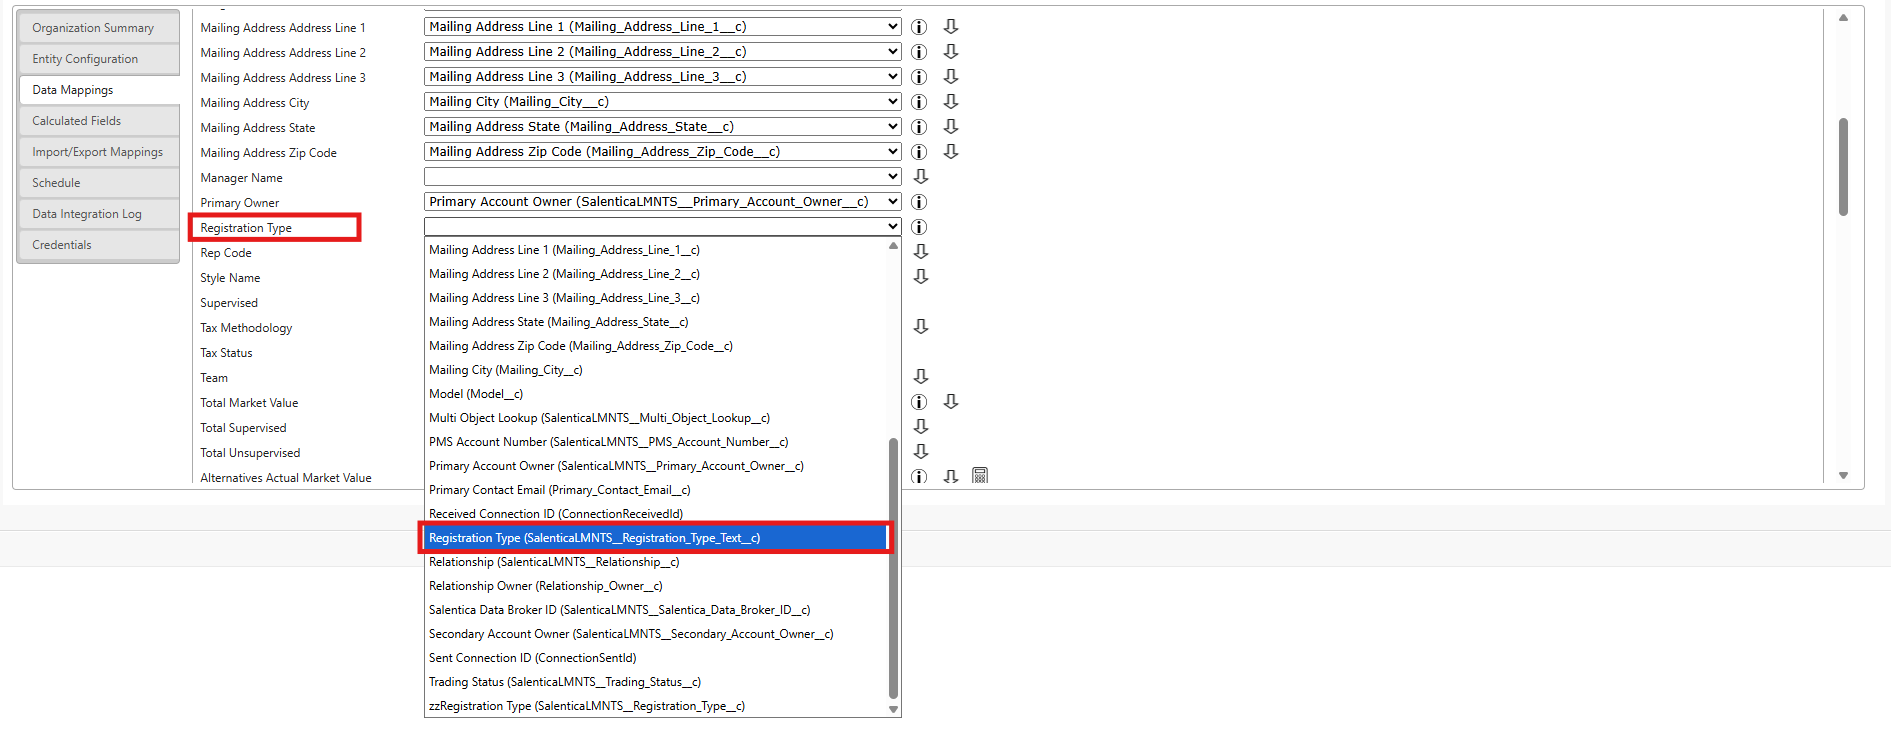
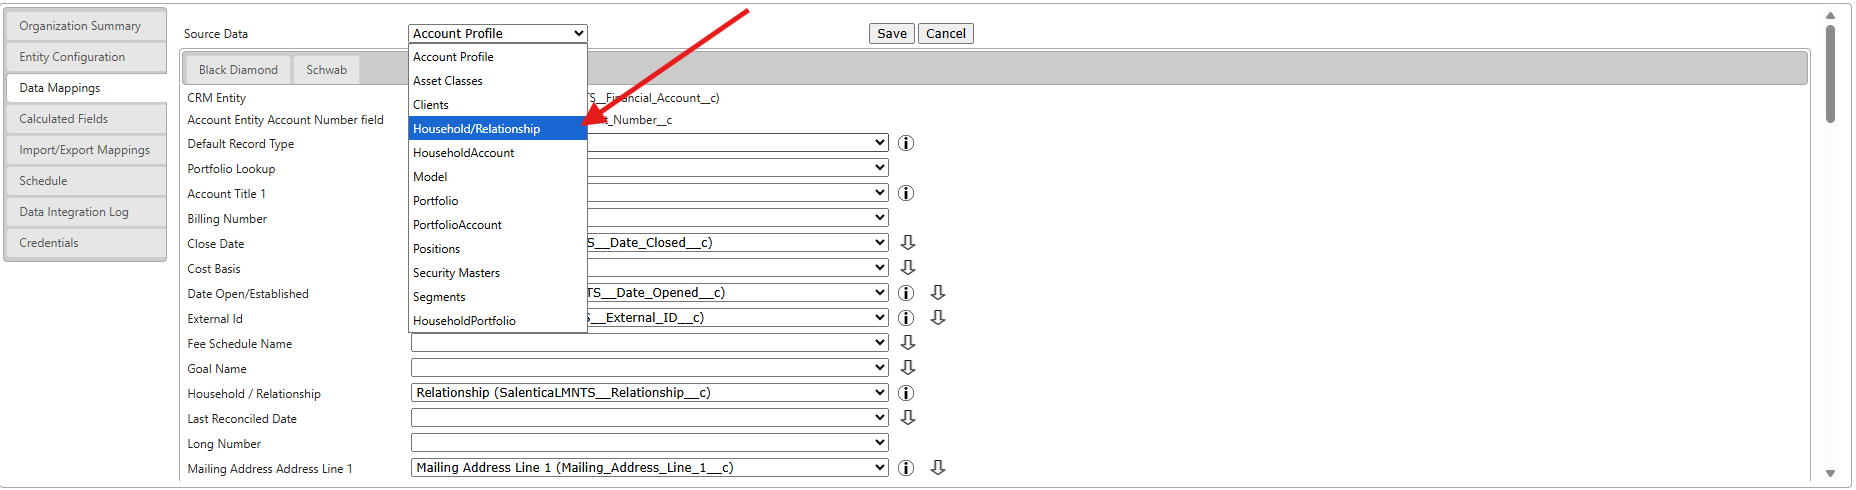
- Depending on what field that you're looking to map and to what object, you'll click the dropdown at the top to choose the Source Entity, find the datapoint that you're looking to map, and then click the dropdown next to it to choose to corresponding Salesforce field that you would like to map it to. In this example, we'll be mapping the Registration Type of the Account Profile to the Registration Type field on the Financial Account object.
- We're going to scroll down on the Data Mappings page and click the dropdown next to Registration Type and we're going to choose "Registration Type".
- Once we've selected "Registration Type", we're going to scroll back to the top of the screen and click Save to save our changes.
- NOTE: If you're going to be updating the mappings for multiple objects, make sure to click Save before switching to the next object in the Data Mappings screen.
The above steps guide through how to map a field that already exists in Salesforce. There may also be cases where you will need to map a data point to a field that does not yet exist in Salesforce or does exist, and is not available in the field dropdown.
How to Update Data Mappings for a New Salesforce Field
Using the guides above, you should now know how to access the Data Mappings and map an existing Salesforce field in Data Broker. This section will guide through how to map a field that is either not listed in the Mappings. Please note that this guide assumes that if a new field needed to be created, that it has already been.
In this guide, we will walk through how to map the Inception Date field on the Relationship.
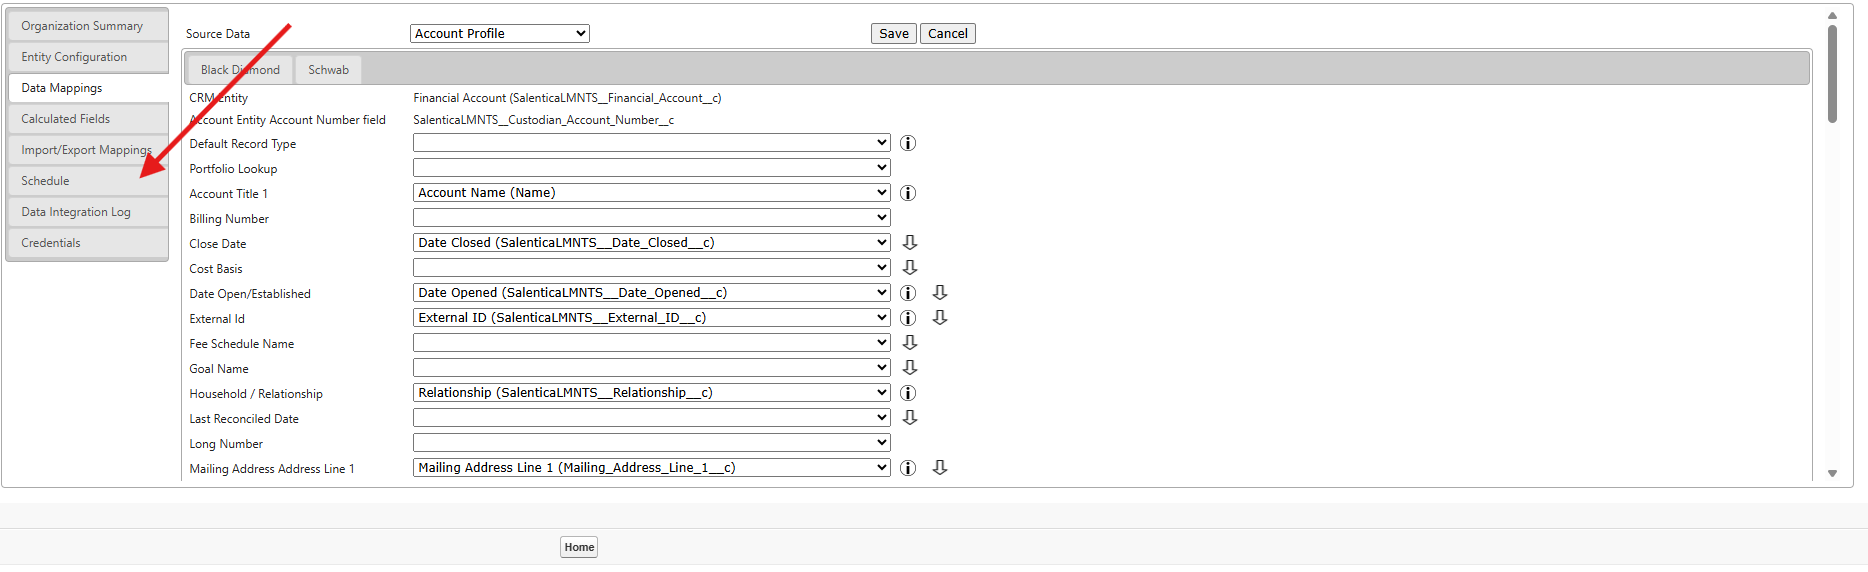
- We'll start by following the steps to access the Data Mappings page of the Data Broker installed package. Once there, we'll click on Schedule on the left-hand side. On the Schedule page, we'll click on Refresh Metadata.
- Refreshing metadata is important in this case because the Salesforce fields that are currently available in the mappings screen are limited to those that were available the last time that data mappings were refreshed. Refreshing the metadata updates the mappable fields to those that are in Salesforce as of now.

- Refreshing metadata is important in this case because the Salesforce fields that are currently available in the mappings screen are limited to those that were available the last time that data mappings were refreshed. Refreshing the metadata updates the mappable fields to those that are in Salesforce as of now.
- Refreshing metadata will typically take a minute to complete. The progress can be checked in the Data Integration Log, which may be clicked on the left-hand side of the page.
- The Data Integration Log shows the progress for jobs that have completed within the last 7 days. This includes metadata refreshes and any other integration jobs that are processed by Data Broker.
- Once the metadata refresh has completed, it is recommended to exit out of the Configuration screen and re-enter it by clicking Configure next to the Salentica Data Broker Installed Package. This gives the opportunity for the browser cache to refresh along with the metadata refresh itself.
- After going back to the Data Mappings page, we're going to click Household/Relationship in the Entity dropdown at the top and then map the now available Client Since field to the Inception Date coming from the source system (in this case Black Diamond).
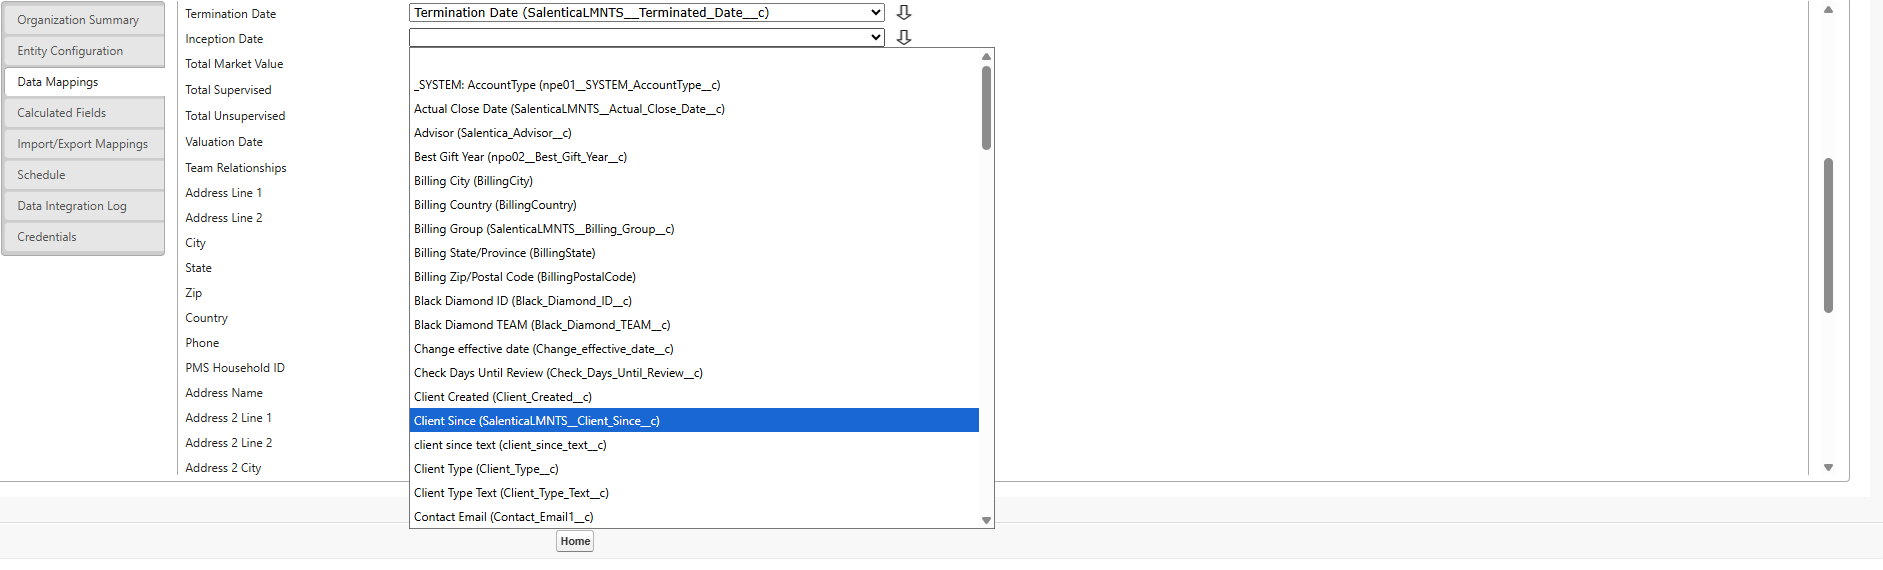
- After mapping Client Since to Inception Date, we'll click Save at the top of the page to finish updating the mappings.
Additional Information
- Certain source systems allow for User Defined Fields or custom fields to be mapped. The entities that these are available for will depend on the source system. These will always be listed at the bottom of the mappings page for the available entity below a horizontal line. Below is an example of this for the Relationship entity from Black Diamond.
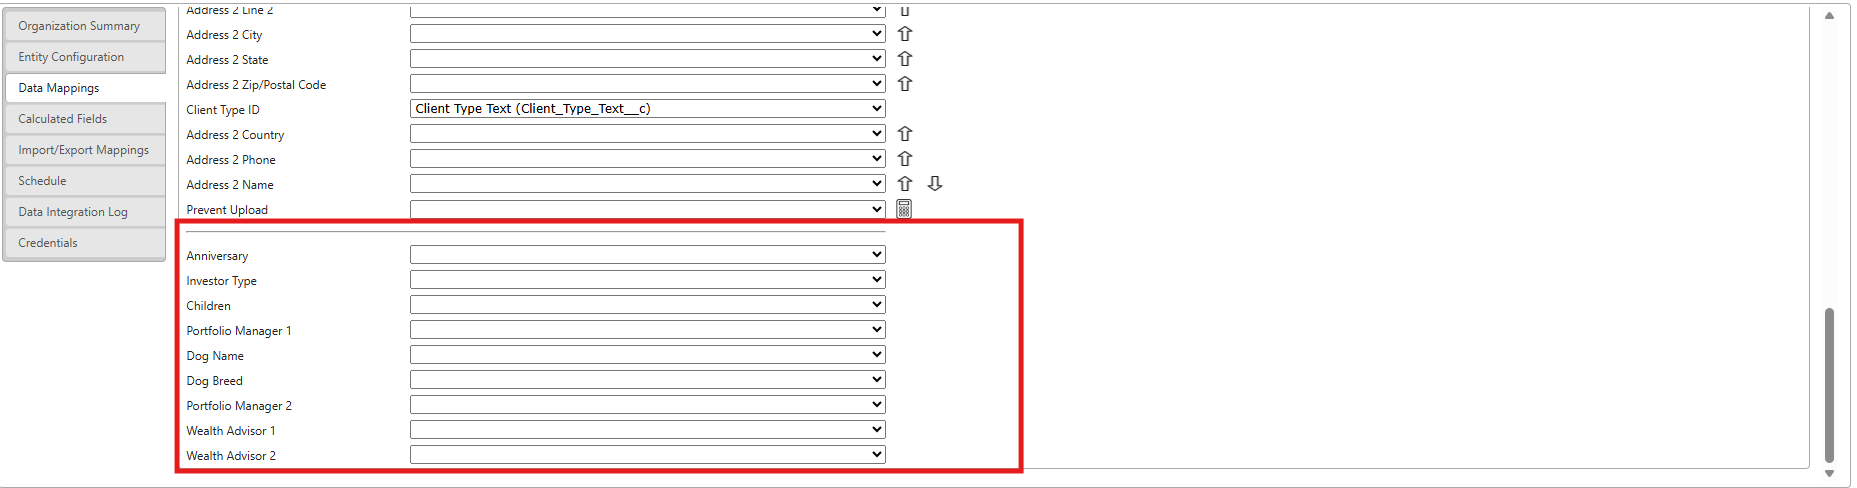
- When mapping UDFs or custom fields, it is recommended to map the source field to a 100 character text field in Salesforce.
- It is important to be aware of the available data types for a mappable field. For example, picklists may not always be available in the list of Salesforce fields available to map. If you're not sure if you can map an existing field, please submit a ticket and the Support Team will assist with how to proceed.
- There are only specific fields that may be available in the query or file that is pulled from your source system. If you do not see the field available in the list of mappable fields then submit a ticket and the Support Team will assist in determining whether a field is available or can be made available.

